
Your microphone is not working on your Skype? Don’t worry! There have already been some effective ways to fix this issue. Here we have compiled a list of troubleshooting methods for your Skype Microphone not working on Windows problem.
Restart your computer
This method helps you restart the services related to computer audio and reset the microphone connection. And this may fix microphone issues on Skype. You need to turn off your computer, disconnect it from power, reconnect the power, turn on your computer, and then test to see if this fixed your mic issue on Skype.
Check your sound settings
Step 1: Press the Win and R keys on your keyboard, then enter “mmsys.cpl“.
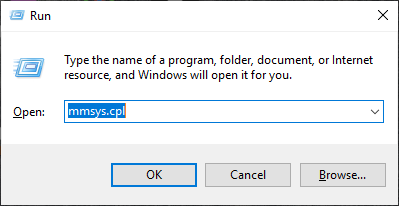
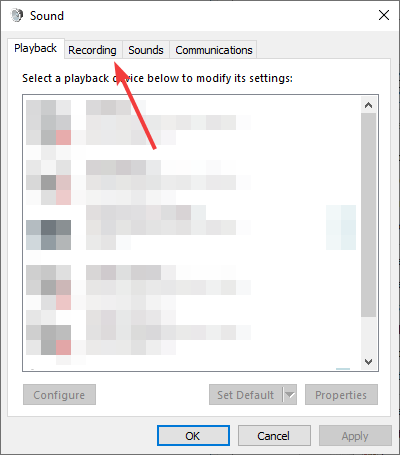
Step 2: Select the Recording tab.
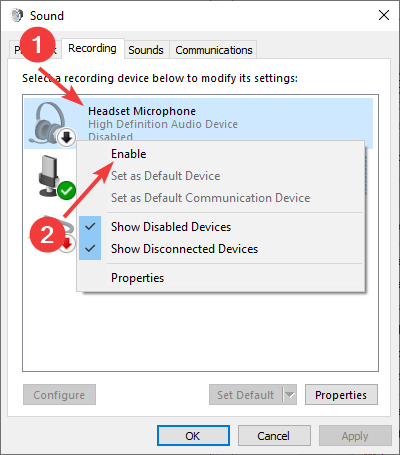
Step 3: Make sure your headset microphone is enabled (right click it and select Enable).
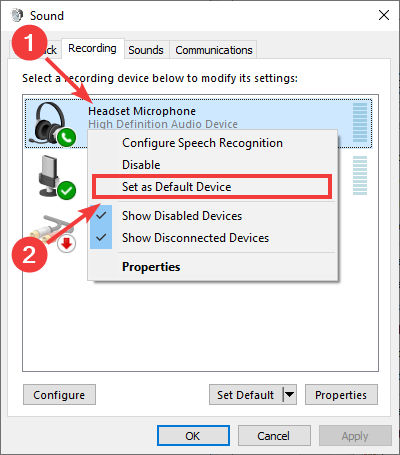
Step 4: Make sure your microphone is set to the default microphone (right click it and select Set as Default Device).
Step 5: Click OK and test your Skype client to see if your microphone is working properly.
Check your Windows microphone settings
* This fix is for Windows 10 users only.
Step 1: Press the Win and I keys on your keyboard.
Step 2: Select Privacy.
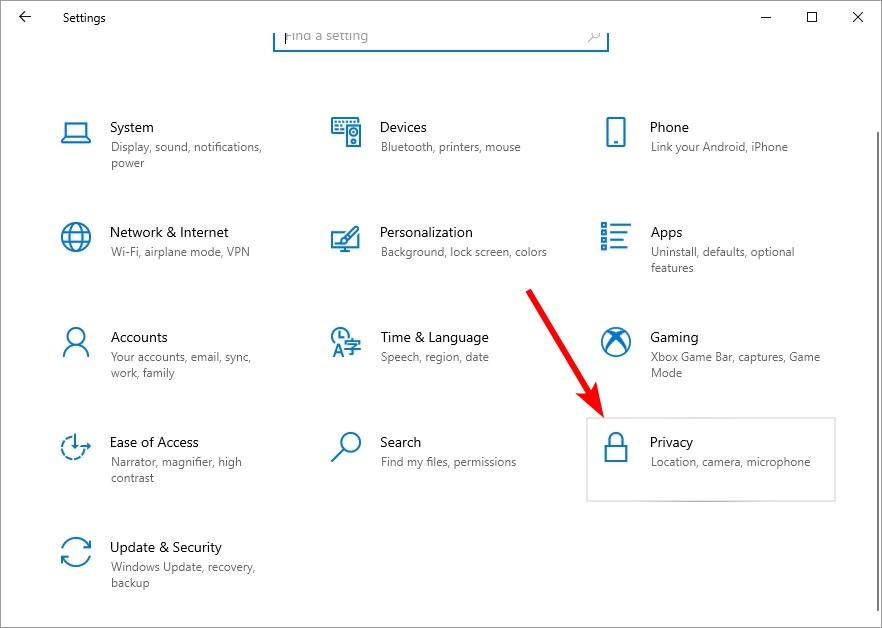
Step 3: Select Microphone.
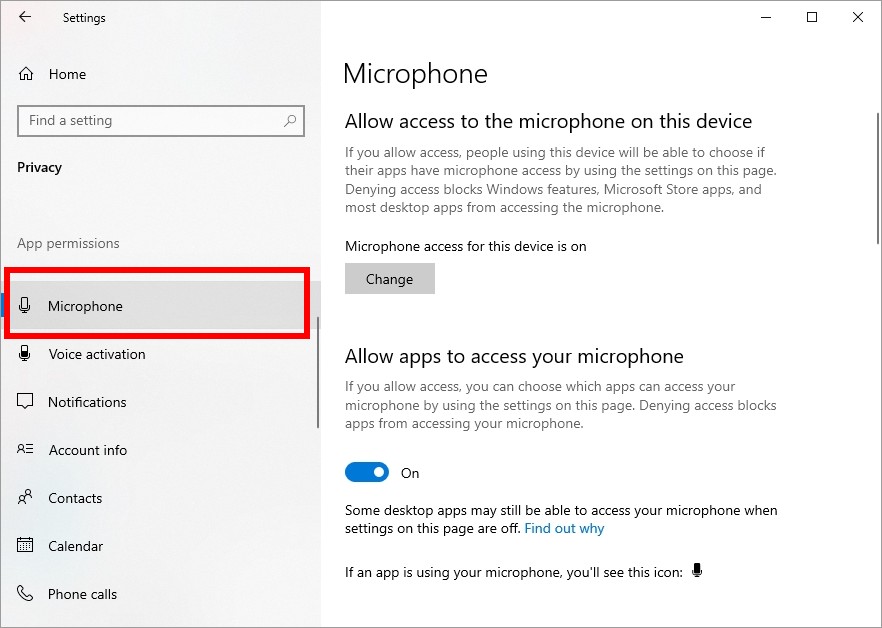
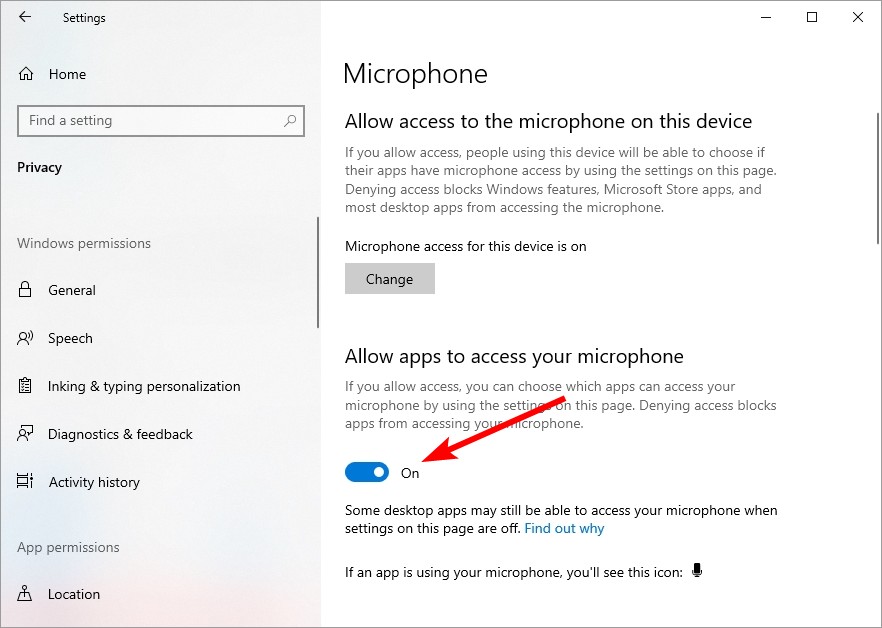
Step 4: Make sure you’ve allowed apps to access your microphone.
Step 5: Make sure Skype has the access to it.
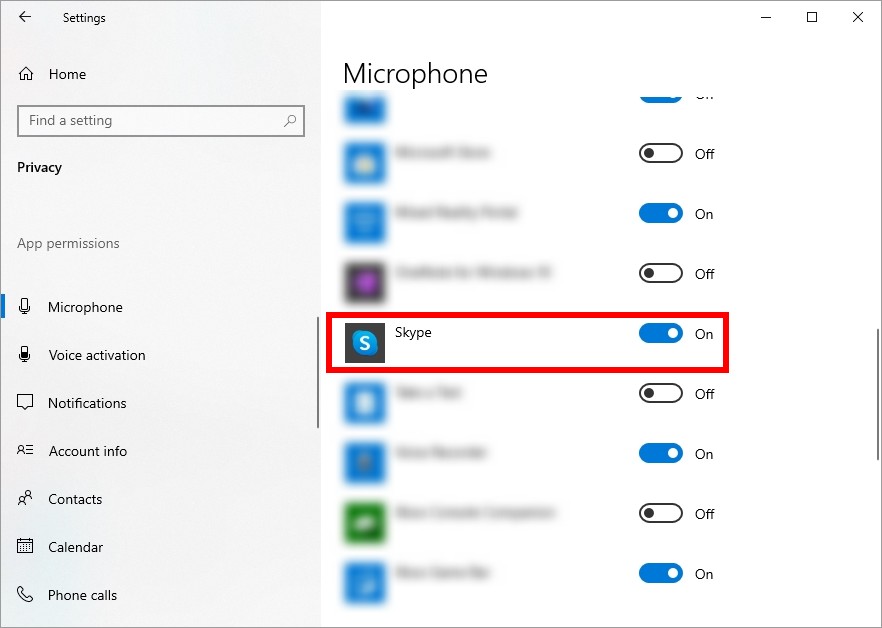
Now check Skype and see if you can hear sound from your mic on the app.
Check your Skype audio settings
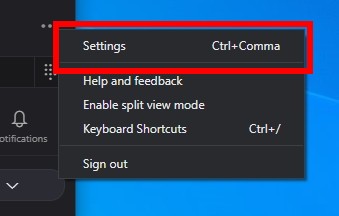
Step 1: On your Skype client, click the menu button and select Settings.
Step 2: Select Audio & Video, and open Automatically adjust microphone settings.
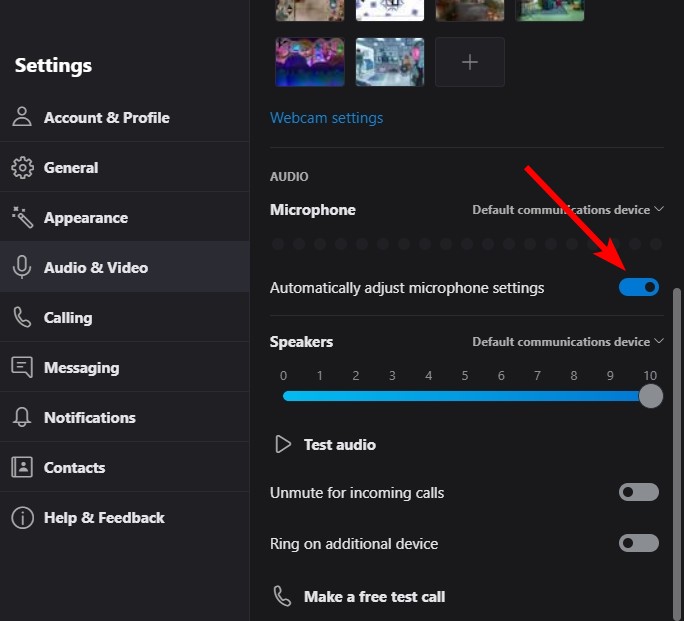
Now test your microphone and see if it works now.
Has any of the fixes above worked for you? Or do you have any other effective ways to solve this problem? Tell us by leaving a comment below!


