“Could not connect to the Steam network” is a very common error — a lot of the Steam users see this error when launching this program. Although it’s common, there are still a lot of ways to get rid of this error, and some of them are listed below. So if you’re also seeing the “Could not connect to the Steam network” error, just take a look at them…
1. Run your Steam client as administrator
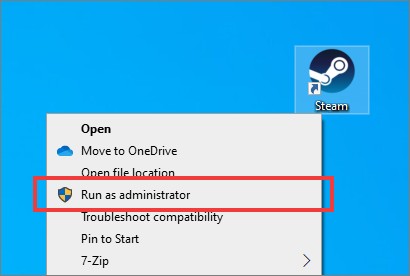
This is a very simple way to fix the “Could not connect to the Steam network” error. To do this, you just simply right click the Steam icon, and select Run as administrator.

This should launch your Steam client as adminstrator, and hopefully you won’t see the error.
2. Use TCP for your Steam connection
The “Could not connect to the Steam network” error can also be fixed by manually specifying the network protocol your Steam client should use, which is TCP.
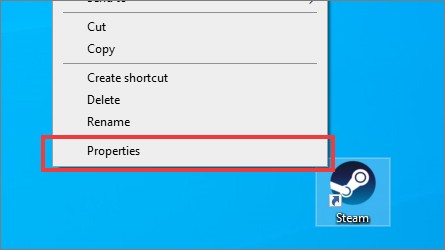
Step 1: Right click the Steam icon on your desktop, and then select Properties.

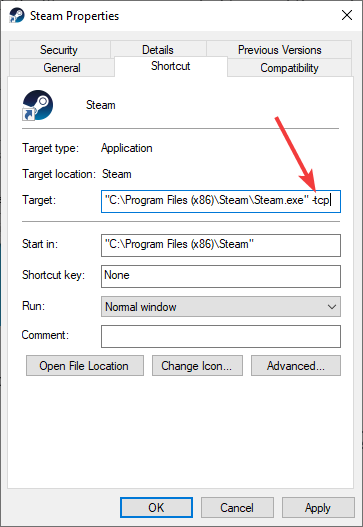
Step 2: Add ” -tcp” to the end of Target.

Step 3: Click OK.
This is how you can use the TCP protocol for your Steam connection. And you won’t see the error, if this method has helped you fix it.
3. Delete some Steam files
This is also an effective fix for your Steam connection error. But note that it may also stop your Steam program from working properly and you’ll have to reinstall Steam. So before you give it a try, you should back up your games using the Backup and Restore Games feature.

Once your games are backed up, follow the steps below to perform this fix.
Step 1: Quit Steam.
Step 2: Right click the Steam icon on your desktop, and then select Properties.

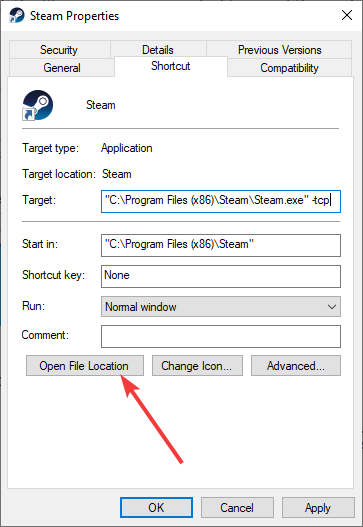
Step 3: Click the Open File Location button.

Step 4: Delete all the files there except the steamapps folder and Steam.exe.
Now double clik Steam.exe to launch the Steam client. And if this method works for you, it should automatically re-download the deleted files, and you won’t see the connection error.
Has your error been fixed? Let us know by leaving a comment below!


